Computer Vision Training, the AIY Vision Kit, and Cats
Review of how to do computer vision training followed with specifics on how to implement this for the AIY Vision Kit

This is a story of how to do a custom pet detector using computer vision. For those who are looking at examples of how to apply computer vision, I hope to illustrate a general methodology that should be applicable across a wide range of applications. My particular issue was cats on my kitchen counter, but there is a wide variety of scenarios where you have a camera that is focused on a particular area and you just want to identify when certain objects appear that don't belong so you can track them.
For anyone that has an AIY Vision Kit, this will also act as a starting guide for how to do custom vision training on your kit until Google does a better job of documenting this. We'll get more technical with some code and specifics around the Vision Kit at the end.
The Challenge 🐈
Cats. They can be cute, but they can also be evil. Mine have got into the habit of jumping on the kitchen counter. They lick food they and random objects. I know don't like the taste of any of this stuff, so it is probably out of spite. The other day one remorselessly murdered my Alexa by dropping my Echo Home off a 7-foot shelf. Not cute anymore 😒.
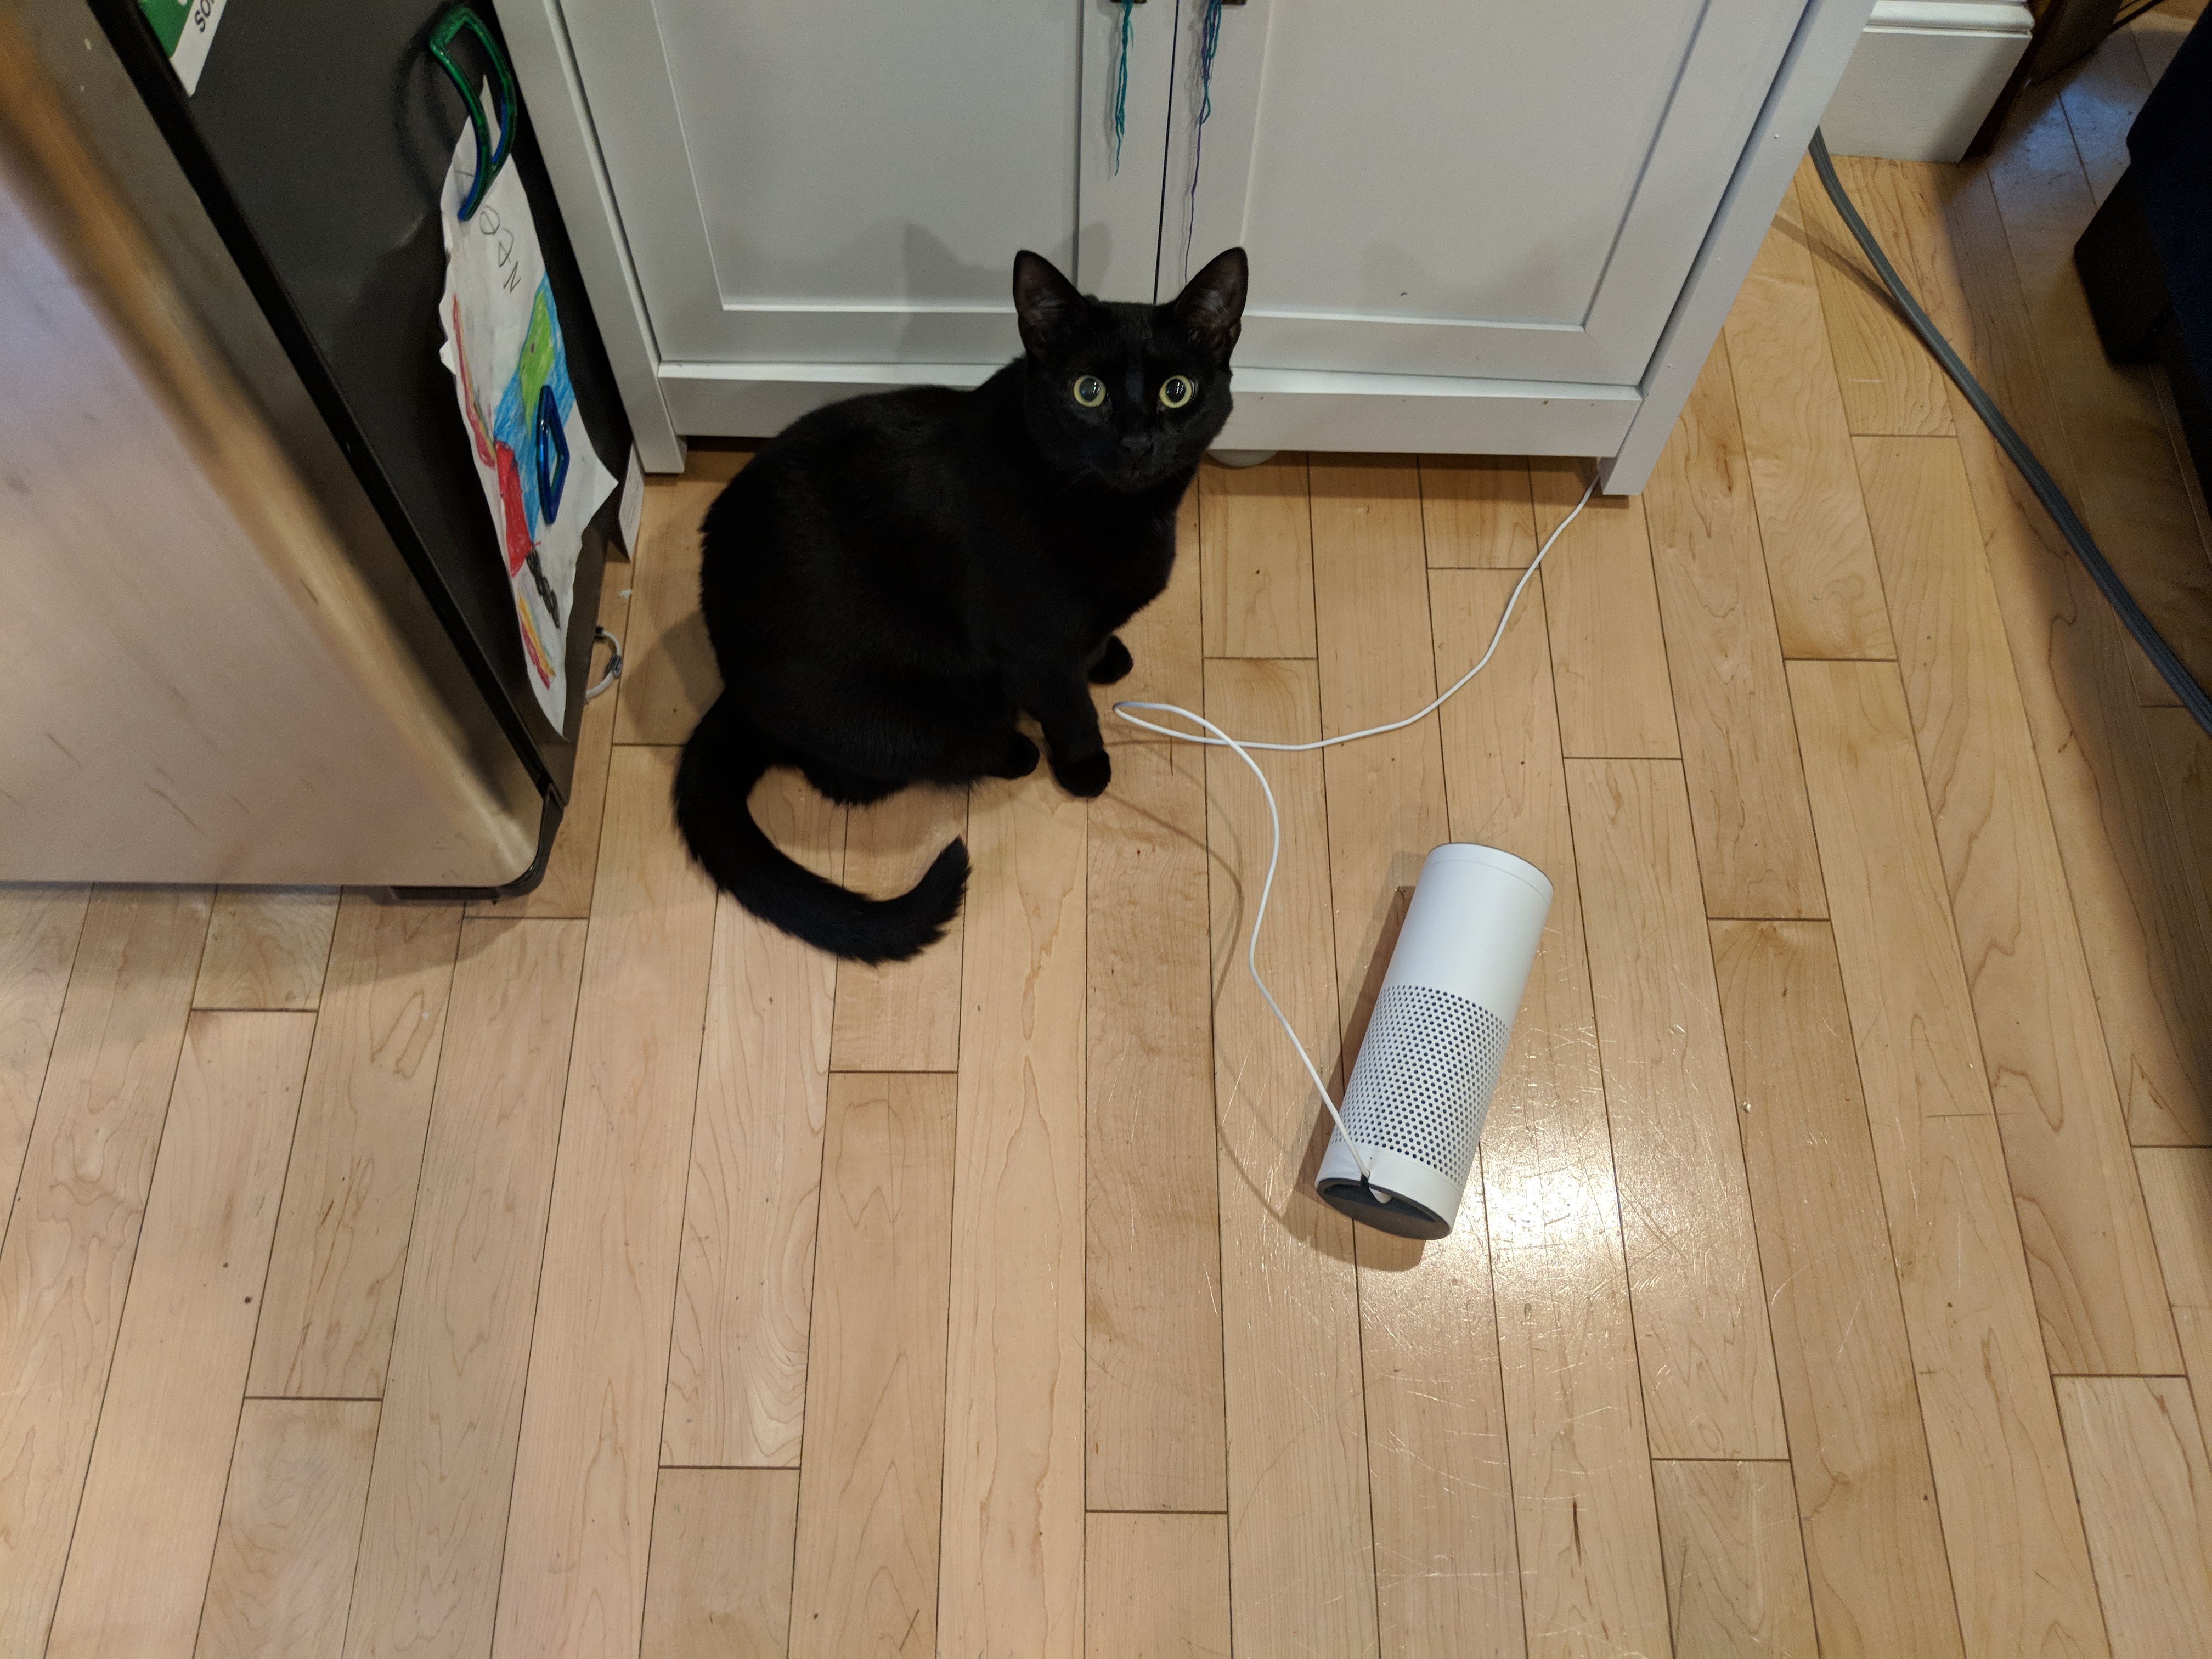
Fig 1. Kitty did not take kindly to the Meow! skill and pushed Alexa to her death
I have fixed pet problems before with modern technology, so I figured I could do the same again using the new AIY Vision Kit I picked up a few weeks ago. To start I just wanted to use Computer Vision to alert me when they jump up where they aren't supposed to be.
First, some Terminology
If you are brand new to Machine Learning and Computer Vision, here are a few terms to keep mind:
- Class - one or more types used to identify an object in an image. For example, the Dog/Cat/Person model has 3 classes - dog, cat, and person.
- Image Classification - the process of using machine learning to identify classes in an image
- Object Detection - the process of using machine learning to identify one or more objects in an image and then classify each with a set of coordinates that indicates where the object is located in the image
- Network - the Neural Network architecture used. Building a Neural Network for computer vision is usually reserved for specialized Machine Learning PhD's. Fortunately, there are many high-quality open source networks available. Some of the popular ones include YOLO, Inception, and Resnet. We will be using the Single Shot Multibox Detector (SSD) with MobileNets in this project.
- Model - a model is a Network that has been trained on a specific dataset.
- Training - for our purposes, this is the process of taking a bunch of labeled data, like a picture of a cat with a label file that says "cat" and the cat's coordinates, to build a model
- Inference - running an image through the model to output a result
AIY Vision Kit - a self-contained vision system that is (comparatively) easy to use
If you are not familiar, the AIY Vision Kit is a $90 "do-it-yourself intelligent camera" from Google that you can get from Target (in the US at least). Aimed at developers and STEM educators, the Vision Kit is housed in a self-assembled cardboard. The hardware includes a Raspberry Pi Zero and a Google designed add-on board called the Vision Bonnet. The Bonnet includes features a special Intel-made processor made for handling the kinds of neural networks modern computer vision algorithms run on. For more on the Vision Kit, see the post I did on webrtcHacks covering the original version.
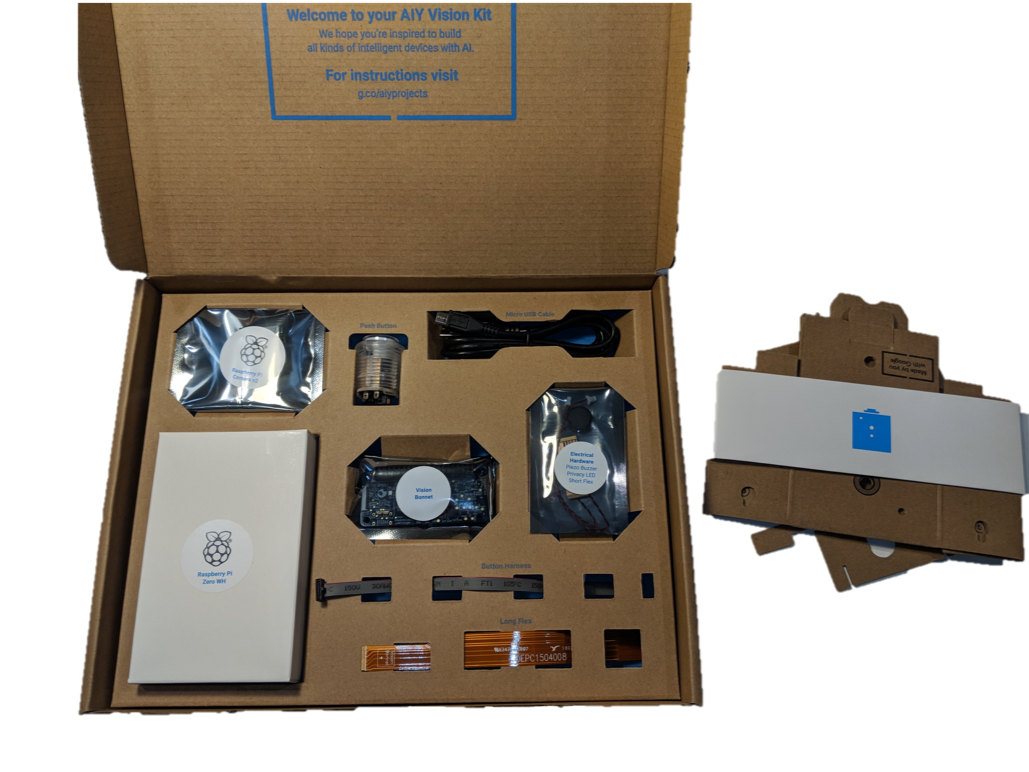
Fig 2. Unboxing the AIY Vision Kit
Cloud vs. Edge AI
Like nearly everything else, it is pretty common to run Computer Vision in the cloud. Microsoft, Amazon, Google, IBM, and others all have Cloud API's you can pay for. As I showed in another webrtcHacks post, it is also not too difficult to setup your own service using Open Source.
The cloud is easy, but is not always best for a few reasons:
- Privacy - not everyone wants to send a live video feed to some remote destination
- Latency - it takes time to send an image up, have it processed, and then get the results back
- Costs - processing images (aka "running inference") in the cloud isn't free
The Vision Kit does what is known as "Edge AI". Inference actually runs on device and no Internet connection is required. In my case this means:
- I don't have to worry about sending images/videos of my house to the wrong API account or who knows who else
- I get instant inference, which is helpful when you want to your application to respond within a few 10's of milliseconds instead of seconds
- I can process as many images as I want without worry how much it will cost - in fact a continuous 30 frames per second video stream
While this post will focus on the AIY Vision Kit, most of the concepts will apply to other embedded AI devices. You can actually buy a different kit from Intel that includes the same chip, just on a USB stick. Microsoft recently announced something similar with a new Qualcomm chip called the Snapdragon™ Neural Processing Engine (NPE).
Included Computer Vision Models
The kit comes with several models. Most are image classifiers:
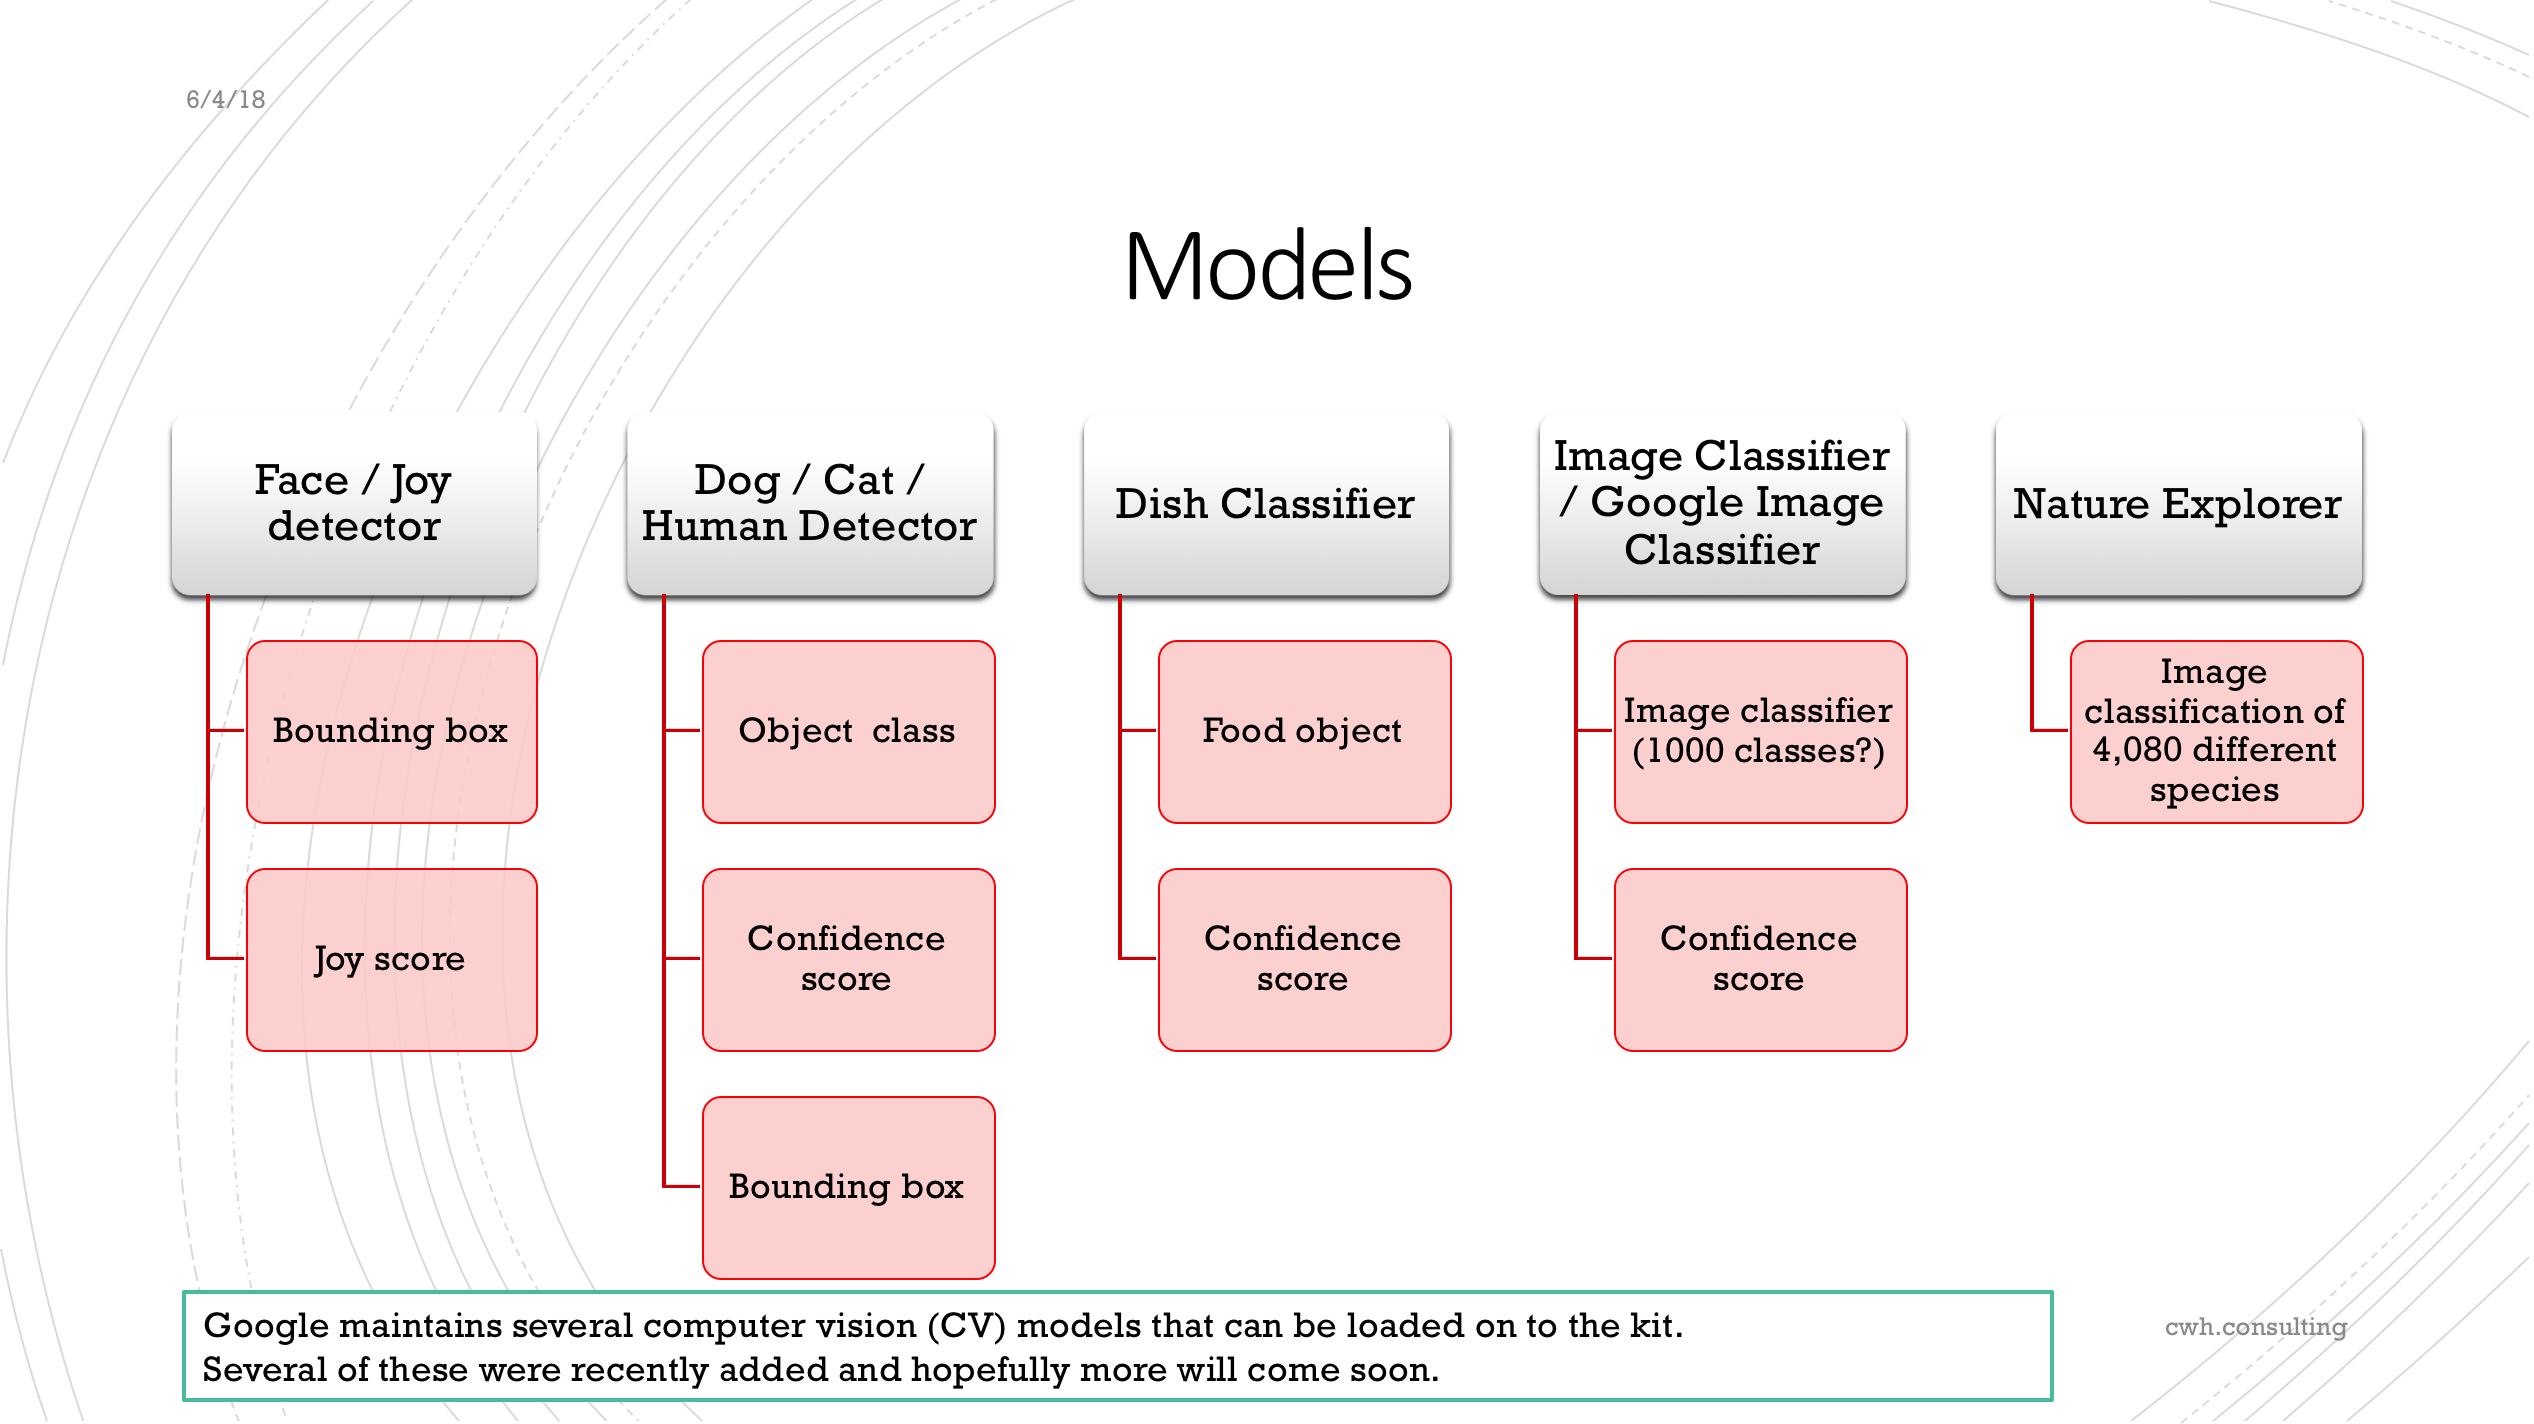
Figure 3. The current models available for the AIY Vision Kit. Source: SlideShare
The AIY Kit also includes a "Dog / Cat / Human" object detector. Since I am looking to detect cats, one would think this would be a quick project. Unfortunately this built in object detector model did not do a great job of detecting my black cats. A bunch of the time it would not classify them at all. Other times I had miss-classifications like this where it mistook a mug full of markers for a person and totally missed the cat:
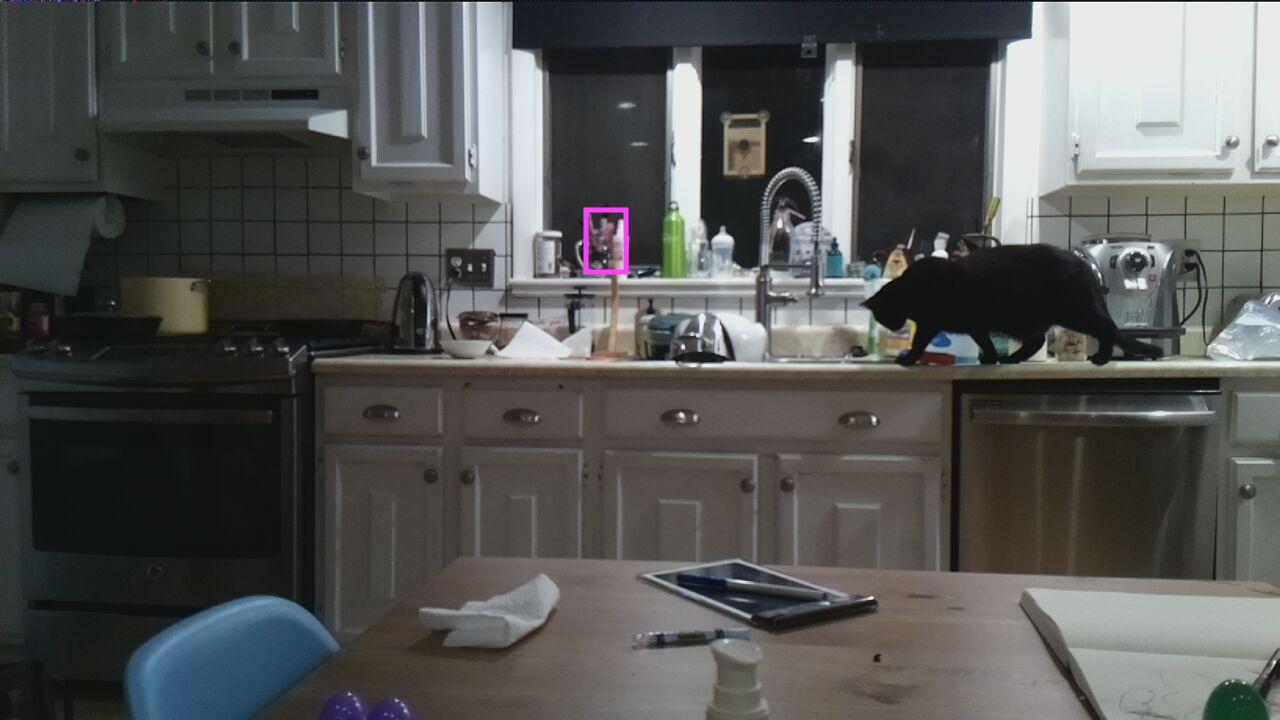
Fig 4. AIY Vision Kit Dog/Cat/Human annotated image after object detection - note the area highlighted with this result Object #0: kind=PERSON(1), score=0.567637, bbox=(586, 208, 39, 65)
Why doesn't it work?
Google has not published how they built this particular model, but it is likely they used pet data like what is found in The Oxford-IIIT Pet Dataset for their pet images when they trained the model. Looking at the pictures of some of the black cats, nearly all of them are on the ground with good lighting. None of them are on a kitchen counter. Perhaps the model just did not "see" enough examples that closely matched my kitchen. I also suspect black cats, particuarly at a distance, are hard because there are not a lot of easily identifiable features when you have low contrast lighting.
Since deep neural networks are somewhat of a black box, it is difficult to tell what is happening. However, this does not mean we need to give up.
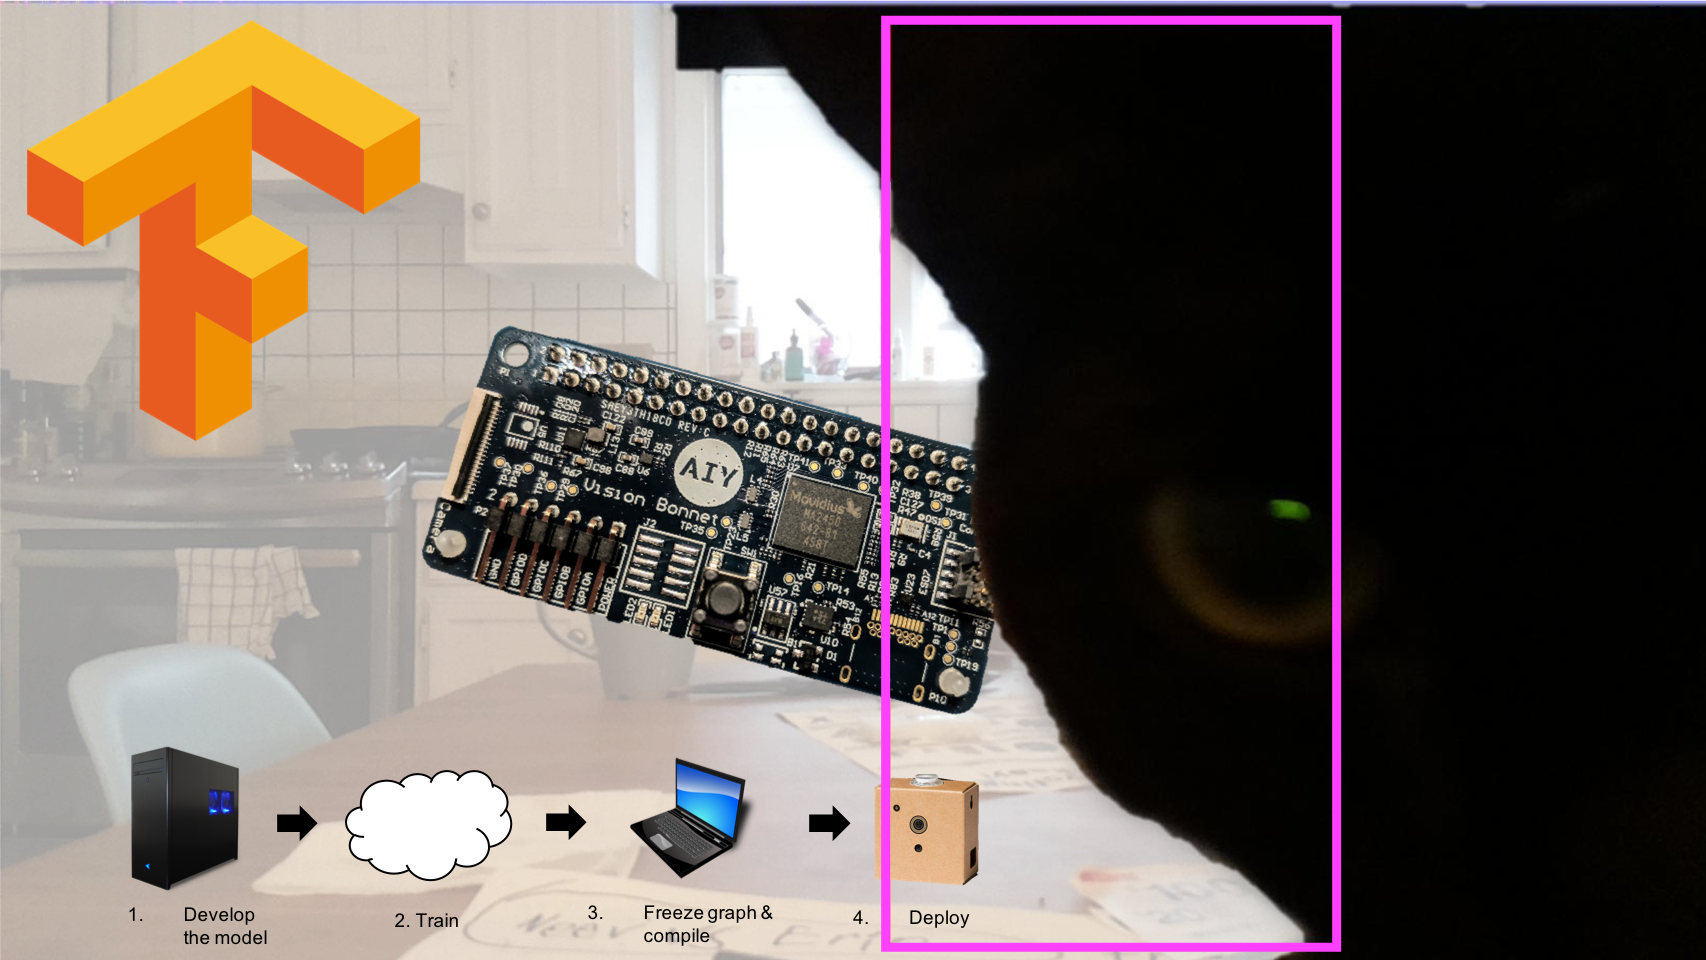
Make it work with Tensorflow and Custom Training
The AIY Vision Kit, like all AI things Google, is based on Tensorflow, the most popular Machine Learning framework on the planet today. With some work, you can load your own models onto the Vision Kit to classify and/or detect whatever you want. Let's give this a try...
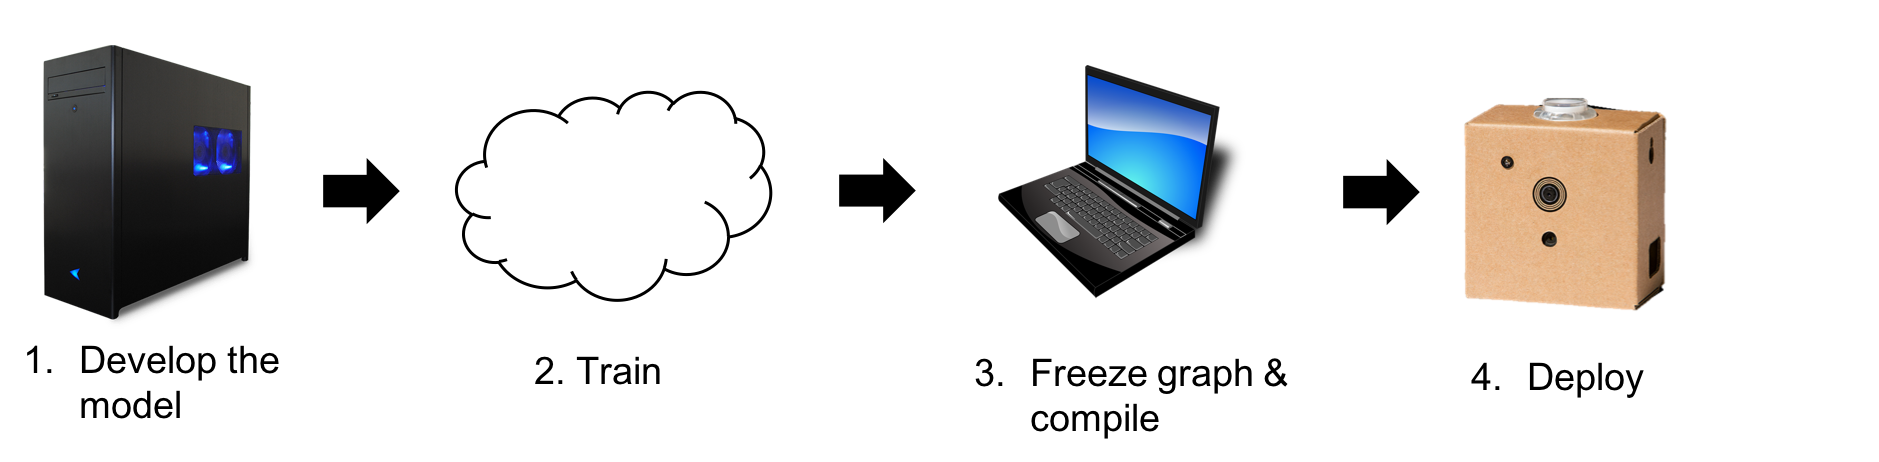
Fig 5. High-level process for custom training on the AIY Vision Kit
Process overview
We will be using Tensorflow's Object Detection API to train our own model. The steps are not for the faint of heart. This will take you hours, after you get the hang of it. Loading the model on the Vision Kit adds a few extra steps.
The whole process goes something like this:
- Get a lot of images covering the classes you care about covering - a couple hundred for each class, ideally covering a variety of angles, backgrounds, and lighting conditions you will encounter in the real world
- Label each image, by hand
- Prepare the dataset for training - convert the labels to the appropriate format, make a label map file, and separate the images into a large training set and a smaller evaluation set
- Set the right parameters inside the object detection configuration file
- Prepare your Tensorflow environment - this can be another list of items if you are training in the Cloud like I did with ML-Engine
- Run the training to produce a graph
- Freeze the graph
- Compile the graph using the Bonnet Compiler (in Ubuntu)
- Load the compiled graph onto the Kit
- Tweak the example code to make it work with the compiled graph
- Fire up your code and hope it all works!
This process is generic for the Object Detection API up to 9. The specifics of the process depend on your environment. I recommend following along with some guides to do this. Two that helped me the most are:
- Streaming Object Detection Video - Tensorflow Object Detection API Tutorial
- How To Train an Object Detection Classifier Using TensorFlow 1.5 (GPU) on Windows 10
I will give some highlights on steps 9-12 below.
Tips for AIY'ers
It was a long saga to get this all working on the Vision Kit. If you want to see the journey with valuable commentary from Googles and community contributions, check out this github issue.
How to generate a bunch of images quickly
The first challenge is getting a bunch of images. I was able to use the Motion Project to generate a bunch of images quickly. Motion is a Linux program that can run on the Pi. It looks for changes in a video camera image between frames and can save a snapshot. I set this up this program to take snapshots whenever motion was detected in the camera's field of view. I did this a bunch of times over a couple days, turning the camera to get different angles, raising its height, making sure the counter and kitchen table had different types of objects on it, and with a variety of lighting conditions.
My cats are very naughty, so it didn't take long for me to get a few hundred images. I also wanted to make sure I could classify people, so I let it run with people around too. In retrospect, I wish I took more people images since there is a lot more variability in people vs my cats who don't change outfits.
Motion includes a ton of parameters. One of my first mistakes was taking too many pictures - I ended up with a lot of pictures that were basically the same. Remember, you need to manually label each of these pictures. I found that including more images without a lot of variety just added to the work load without changing the accuracy much. I should have put a longer delay between taking snapshots.
Setting up your pipeline configuration file
For object detection on the AIY Vision Kit, you need to start with this configuration file: embedded_ssd_mobilenet_v1_coco.config
Then change the following lines:
- num_classes - set this to the number of classes (counting from 1) for your custom model - in my case this was 2 (cat & person)
fine_tune_checkpoint- used if you are going to continue training from a saved checkpoint. Leave it out if you are going to train from scratch. More on this in a bitinput_path- path to your trainingrecordfilelabel_map_path- where you saved your label map file
Training on Google Cloud
I originally tried to do some training on my MacBook Pro. You usually need to run 10,000's of thousands of training steps up to 200,000. With no usable GPU for training on my Mac, sometimes a step could take up to 5 seconds. Doing the math, 100,000 steps would take me many days, not to mention nearly melt my machine from running at full tilt all that time.
So I then decided to move my training to Google Cloud's ML-Engine, mostly because that seems to be the best documented as part of the Object Detection API repo.
This involves a bunch more extra steps and some fiddling to make it work. When I first tried it, it would run for a while but would eventually fail due to memory issues (which I addressed by adjusting the batch size). Other times it would fail a few minutes in (I never fully figure out why). When this process is spread over a handful of machines and you are doing it a few times you can quickly burn through your Latte budget for the day without doing any real training.
In the end I found it simplest to just run on a single machine with the following:
gcloud ml-engine jobs submit training object_detection_eval_`date +%s` \
    --job-dir=gs://n5r8-cat-detector/train \
    --packages dist/object_detection-0.1.tar.gz,slim/dist/slim-0.1.tar.gz \
    --module-name object_detection.eval \
    --region us-east1 --scale-tier BASIC_GPU --python-version 3.5 \
    --runtime-version 1.6 \
    -- \
    --checkpoint_dir=gs://{{my-gcp-bucket}}/train \
    --eval_dir=gs://{{my-gcp-bucket}}/test \
    --pipeline_config_path=gs://{{my-gcp bucket}}/data/ssd_mobilenet_v1_cat.config
I originally intended to let this run for a while to verify it works before switching to running it on multiple machines. Then, once it was working I was hesitant to mess with it (and I had other things to do), so I just let it run in the background.
My last run ran for 100,000 steps consuming 10.67 ML-units for a total cost of $5.30.
Running the Bonnet Compiler
You need to compile your graph to run on the Vision Bonnet. After you download the Bonnet Compiler, you'll need to find a place to run it. The Vision Kit page says:
The compiler works only with x86 64 CPU running Linux. It was tested with Ubuntu 14.04. You should NOT run it on VisionBonnet.
This is a pain for those that are running OS X (me) or Windows. Fortunately for me, I already had an Ubuntu instance setup on VirtualBox. Installing and configuring VirtualBox this up is is a bunch more steps. If you do this, make sure you use the Virtual Box guest additions package to make it easy to pass files back and forth from the host machine to VM.
I am running Ubuntu 16.04 and it works fine for me.
If I was starting from scratch and just needed a quick Ubuntu environment to run the compiler then I probably would just use Docker. Now that I think about it I wish I tried that.
Compiler command
Here is the compiler command I used:
./bonnet_model_compiler.par \
    --frozen_graph_path=aiy_cat_detector.pb \
    --output_graph_path=cat_detector.binaryproto \
    --input_tensor_name="Preprocessor/sub" \
    --output_tensor_names="concat,concat_1" \
    --input_tensor_size=256
Note the output tensor names. This part was not obvious and one of the Googler's pointed it out to me.
AIY Object Detection code changes
If that all works, now you need to do some tweaks to the AIY Vision Kit object detection samples to make it work.
Change the Object Detection helper library
Make a copy of https://github.com/google/aiyprojects-raspbian/blob/aiyprojects/src/aiy/vision/models/object_detection.py and modify 3 lines:
- Line 29 to modify the labels to match what you setup in your training
- Line 75 to change the assertion here from
4to match your number of labels - Line 84 - change the index here from
4to match your number of labels
Write your program
Image Inference
I started out by modifying the object_detection.py for initial testing. All you need to do is change from aiy.vision.models import object_detection to your modified object_detection.py helper file like this:
from aiy.vision.inference import ImageInference
# from aiy.vision.models import object_detection
# Use my modified file instead
import aiy_cat_detection
Camera Inference
Lastly, I wrote/modified a program to run CameraInference. I added a couple other bells & whistles, like the privacy LED indicator and some sounds.
The full thing is just:
import argparse

from picamera import PiCamera
from time import time, strftime


from aiy.vision.leds import Leds
from aiy.vision.leds import PrivacyLed
from aiy.toneplayer import TonePlayer

from aiy.vision.inference import CameraInference
import aiy_cat_detection

# Sound setup
MODEL_LOAD_SOUND = ('C6w', 'c6w', 'C6w')
BEEP_SOUND = ('E6q', 'C6q')
player = TonePlayer(gpio=22, bpm=30)

def main():
    parser = argparse.ArgumentParser()
    parser.add_argument(
        '--num_frames',
        '-f',
        type=int,
        dest='num_frames',
        default=-1,
        help='Sets the number of frames to run for, otherwise runs forever.')

    parser.add_argument(
        '--num_pics',
        '-p',
        type=int,
        dest='num_pics',
        default=-1,
        help='Sets the max number of pictures to take, otherwise runs forever.')

    args = parser.parse_args()

    with PiCamera() as camera, PrivacyLed(Leds()):
        # See the Raspicam documentation for mode and framerate limits:
        # https://picamera.readthedocs.io/en/release-1.13/fov.html#sensor-modes
        # Set to the highest resolution possible at 16:9 aspect ratio
        camera.sensor_mode = 5
        camera.resolution = (1640, 922)
        camera.start_preview(fullscreen=True)

        with CameraInference(aiy_cat_detection.model()) as inference:
            print("Camera inference started")
            player.play(*MODEL_LOAD_SOUND)

            last_time = time()
            pics = 0
            save_pic = False

            for f, result in enumerate(inference.run()):

                for i, obj in enumerate(aiy_cat_detection.get_objects(result, 0.3)):

                    print('%s Object #%d: %s' % (strftime("%Y-%m-%d-%H:%M:%S"), i, str(obj)))
                    x, y, width, height = obj.bounding_box
                    if obj.label == 'CAT':
                        save_pic = True
                        player.play(*BEEP_SOUND)

                # save the image if there was 1 or more cats detected
                if save_pic:
                    # save the clean image
                    camera.capture("images/image_%s.jpg" % strftime("%Y%m%d-%H%M%S"))
                    pics +=1
                    save_pic = False

                if f == args.num_frames or pics == args.num_pics:
                    break

                now = time()
                duration = (now - last_time)

                # The Movidius chip runs at 35 ms per image.
                # Then there is some additional overhead for the object detector to
                # interpret the result and to save the image. If total process time is
                # running slower than 50 ms it could be a sign the CPU is geting overrun
                if duration > 0.50:
                    print("Total process time: %s seconds. Bonnet inference time: %s ms " %
                          (duration, result.duration_ms))

                last_time = now

        camera.stop_preview()

if __name__ == '__main__':
    main()
All my code and model is available on GitHub for reference.
Starting from Scratch vs. Transfer learning
Transfer learning is the idea of taking an existing model and quickly retraining it on a new set of classes. Rather than starting from scratch, you can just remove that last few layers of the neural network and then perform a relatively small number of training steps to produce a new model. The fine_tune_checkpoint above lets you do this.
Unfortunately, Google did not publish their model other than in its compiled binary form. Tensorflow does publish a number of models based on various sets that are useful for transfer learning. However, the particular MobileNet SSD configuration that the Vision Bonnet requires - a 256x256 input image with depthwise multiplier of 0.125 - is not one of them.
With no existing model to work from, I tried to train my model from scratch. This did not work well. It would sometimes think my oven was a person. I suspect my input images did not have enough variety for it to accurately distinguish between objects. I never really learned what features make an object.
Then zhoujustin saved the day and shared a trained model based on the 20-class VOC dataset. I set this as the fine_tune_checkpoint and my results have been pretty good.
The results
After struggling to get something to work, my new custom trained model works great!
Here is an example with very low light:

And here is one where my cat seems to be more attracted to the constant beeping my kit is making instead of running away from it:
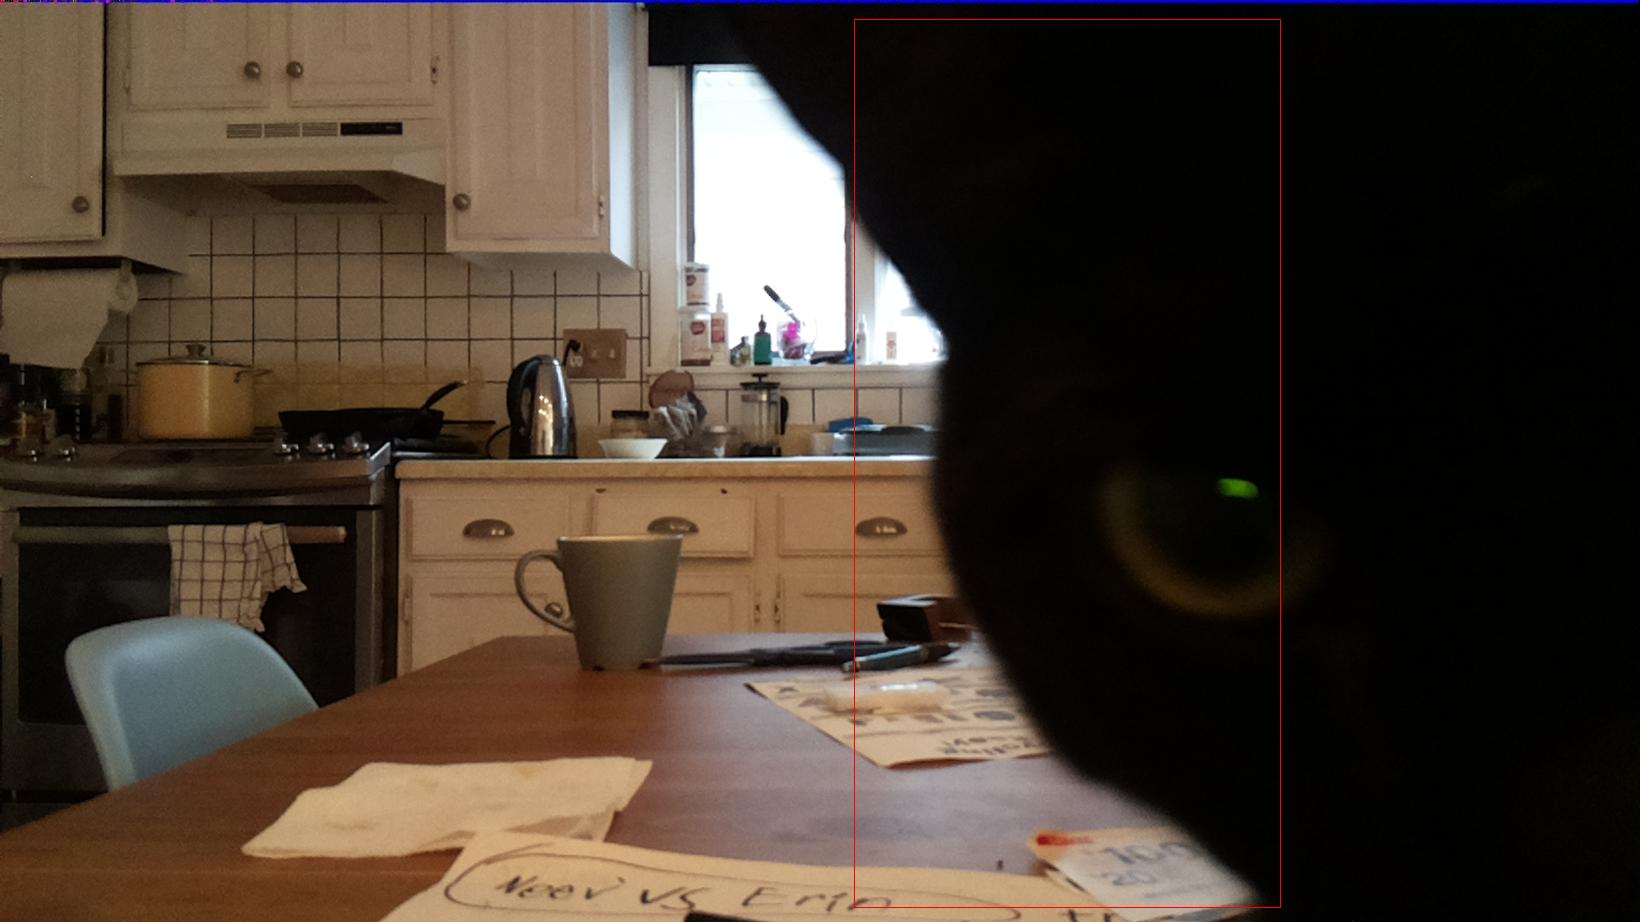
I have some work to do here on the deterrent part, but at least now I have accurate detection. Next step is to get my robot involved. The bounding box coordinates will come in handy for aiming projectiles...
Conclusions
Ideally the built in AIY cat detector model would have worked for me out of the box, but that is really wishful thinking to expect it to work well in all circumstances. It is exciting to see you can get high accuracy results through custom training - even when inference is running on a low-power device.
It several months to make this work, but we got there eventually. Thanks to everyone on GitHub issue 314 for helping!
Now I need to get back to shooing my cats off the counter...
Chad Hart is an analyst and consultant with cwh.consulting, a product management, marketing, and and strategy advisory helping to advance the communications industry. He is currently working on a AI in RTC report.