Voicebot usage with smart phones and smart speakers is growing like a storm. Bots in general are making their way to more customer-support use cases, but it is still pretty rare to hear a voicebot on a customer support phone call. Amazon is one of the major tech giants looking to change this with a combination of some of their recent capabilities.
In this blog, I will show you how to build a voicebot for your business using a combination of Amazon's bot and contact center services - Amazon Lex and Amazon Connect.
Introduction to Amazon Lex and Connect
Lex is Amazon’s Natural Language Understanding (NLU) service for bots. It includes an Automatic Speech Recognition (ASR) - aka Speech-to-Text (STT) - option so it can handle voice in addition to text. Since it is an AWS service, it incorporates Amazon’s usual scalability and pay-as-you-go model that developers and developers of all sizes have come to depend on.
Amazon Connect is a Contact Center as a Service (CCaaS) that can be set up in a few minutes. Rather than building a call center from scratch or purchasing expensive software, Amazon Connect provides tools to make provisioning a call center easy. Connect includes a phone number for incoming and outgoing calls with tools for provisioning agents quickly from a dashboard.
Taken in combination, AWS and Lex can be used to build a Conversational IVR. The advantage of AWS combo over the existing solutions is that you can connect your Lex bot to the dial-in number without a 3rd party service. This reduces many complexities such as setting up a telephony interface between the dial-in number and the bot, reduces latency (given the Lex bot and Amazon Connect are in the same AWS region), making changes and publishing is faster.
Architecture
When you are building a conversational IVR voicebot, you need 3 main components.
- Bot engine
- Telephony infrastructure - to handle calls
- RTC-bot gateway - to connect the bot to the telephony system
Amazon Lex acts as the voicebot in our case. Amazon Connect provides the dial-in number for the voicebot. Fortunately, we don’t have to look further for a RTC-bot gateway since Amazon Connect can connect directly to the Amazon Lex based voicebots. You can check this documentation for more details.

Pricing
The pricing is split between Lex and Connect since you need both services:
| Amazon Lex | Price in USD* |
|---|---|
| Speech request | $0.004 / request |
| Text request | $0.00075 / request |
| Amazon Connect | |
| Phone number (U.S. East) | $0.03 per day |
| Inbound usage (U.S. East) | $0.0022 per minute |
*Amazon Connect and Lex pricing snapshot as of 2019 Dec 30th.
Let’s say you have a smaller call center with 10,000 calls a month, with an average call duration of 3 minutes. Assuming a split of 50%, 40%, 10% for the bot, customer and silence respectivley in each call, we can calculate the total cost for Amazon Lex and Connect. For each call, on average we are sending 5 speech requests to Lex.
| Billable item | Unit Price | Unit | Units | Total |
|---|---|---|---|---|
| Lex speech requests | $0.0040 | /request | 50,000 | 200.00 |
| Amazon Connect - Phone number | $0.0300 | /day | 20 | 0.60 |
| Connect - Inbound usage | $0.0022 | /minute | 30,000 | 66.00 |
| ------------------------------------------- | -------------- | ------------ | ---------- | ------------ |
| Total | $0.0089 | /minute | 30,000 | $266.60 |
Your total cost is around $267, given you are not using any monitoring or storage functionality. That comes to less than a tenth of a cent, much less than competitive voicebot telephony options.
How to Guide
Creating a Voicebot using Lex
Assuming you have an AWS (Amazon Web Services) account already, all you have to do is to click on Amazon Lex service. If this is your first bot then choose Get Started, otherwise, click create. Lex offers few templates for building bots, I will choose Custom Bot so you can build any bot you wish.

I have named the bot RestaurantBot since this is a bot intended to make reservations for a restaurant. The default language is US English and you can choose male or female voices and type sample texts to hear the voice samples. The session time out defines how long you would like the bot to keep the context of the conversation when the customer goes silent. Here I have chosen 1 minute as that’s kind of ideal for a restaurant reservation. If you would like to measure the sentiment of the customer conversations, then click Yes. The IAM role is automatically created and you can opt for COPPA based on your preference.
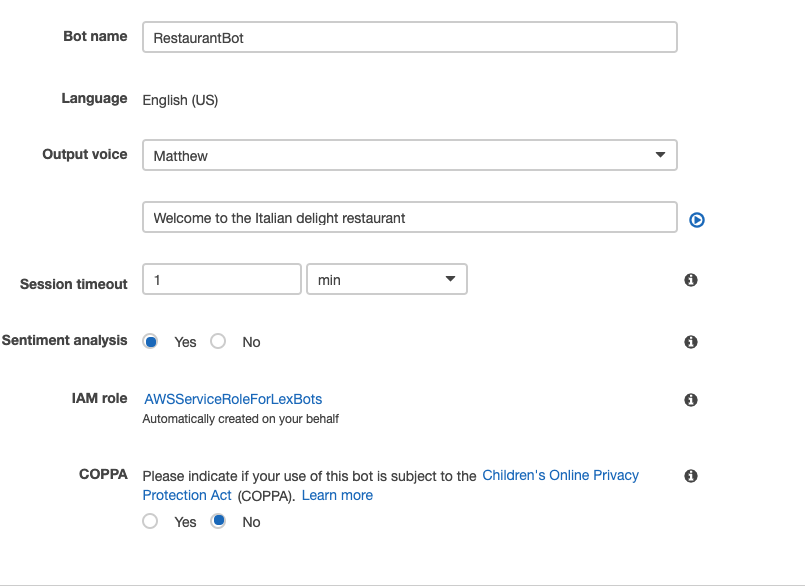
Click on Create and the first screen is about creating an intent.
Bot terminology
Before we go too far, let’s review some terminology. When you are building/training with bots using Dialogflow, Amazon Lex or any other virtual assistants, you need to be familiar with some basic Natural Language Processing (NLP) concepts:
- Intents - The intention or goal of the customer. A customer booking a table can be an intent e.g. BookMyTable
- Utterances - These are the spoken phrases by the customer to invoke an intent. This could be any phrase for reservation e.g. Can I have a table for two? I am looking for a dinner reservation, etc.
- Slots - The essential information needed for the voicebot to fulfill a customer request. This could be the date or time or the number of people, etc.
- Fulfillment - This is the action you want the voicebot to perform when the essential information is available. This can be two things, a response to the customer saying the reservation was successful or failure and a message to the restaurant for booking the slot.
There is plenty of documentation out there that explains these in more detail.
Creating an Intent
Click on Create intent and give a unique and identifiable intention/goal name. Here I have chosen BookMyTable.
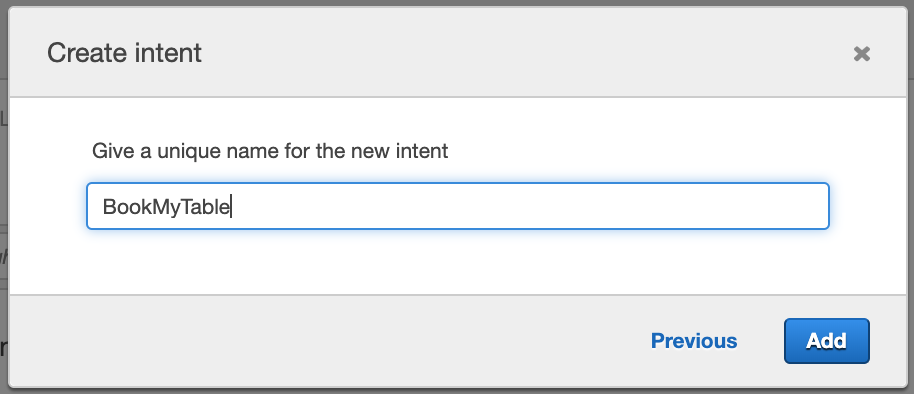
Click Add and that's it. Good job - you have created your first intent!
Now you will add a sample utterance for the bot so it can relate the phrases to the intent you just created.
Adding sample utterances
Type in the common spoken phrases you would use while making table reservations. I am using the following samples.
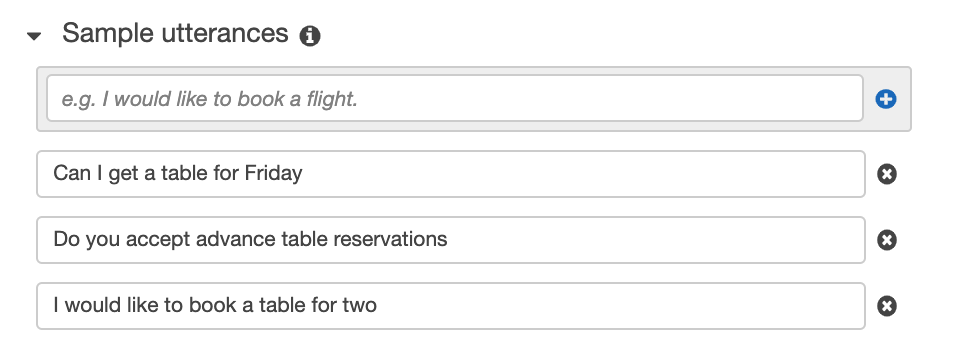
One advantage of using Lex is that you can also invoke a Lambda function for processing the customer inputs. I will talk about some use cases of using Lambda functions briefly in the last section. Now that you have trained the intent with some utterances, the next step is adding slots.
Adding slots
Slots make sure the bot has all the information needed from the customer to perform an action or lead to the fulfillment of a request. For making a restaurant reservation, you probably need 4 essential slots.
- Name of the customer
- Date of the reservation
- Time of the reservation
- Number of people
The customer might already give some of this information and you can add the slots within the Sample utterances to catch them early so that the bot need not ask those questions again.

We can make each slot name mandatory or optional depending on the bot you are building. The slot type will define the input type expected from the customer. The prompts are like utterances from the bot to receive customer input. I have made all the slots as mandatory since a restaurant would require all that information to confirm a reservation unless the customer has table preference or food allergies, etc.
We can add a confirmation prompt after adding the slots. This will repeat the reservation details and confirm with the customer. I am reading out the customer inputs using the slot names we defined earlier.

Adding fulfillment
Fulfillment lets you send the reservation details (if everything goes well) to your restaurant’s booking system by invoking Lambda functions or return the parameters to the customer. The Lambda function can come in handy when you want to check the reservation against the availability of tables or opening hours, etc. This bot can start another conversation with the customer with alternative options.
The conversation ends with adding a response and saving the intent. You can add your favorite greeting here.

Build, Test and Publish
Click on the “Build” button on the top right corner and this would show all the errors and these errors are self-explanatory so you can easily debug the errors. Once you confirm the build and if the build is successful, you will get a message shown below.

To test the bot, start by entering one of the spoken phrases you have added as utterances and continue the conversation.
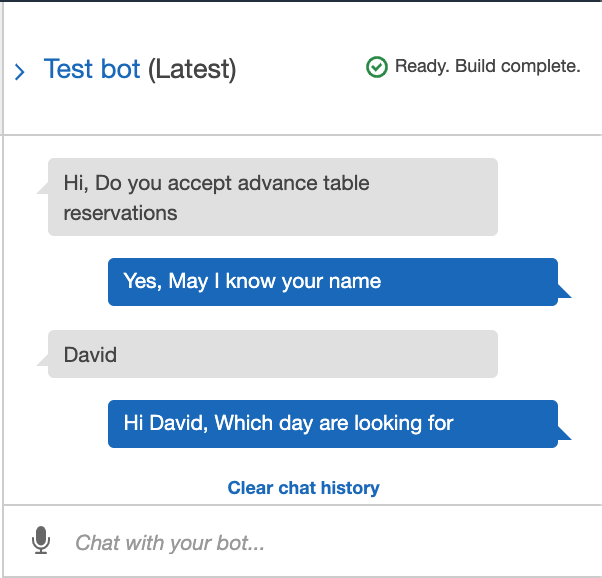
Once you get the correct responses, you can now publish the bot by clicking Publish and this bot will be available for other AWS services to access. Do not forget to create an alias name for Amazon Connect to identify this bot among other bots you created. You have completed building a basic bot, great job!
Now let’s add a dial-in interface for it.
Adding a dial-in number for your bot with Connect
We will use Amazon Connect to add a phone number than can dial into the bot. Start by selecting the Amazon Connect service from AWS services and choose Get Started or Add Instance if you already have an Amazon Connect Instance. You can give a unique name for the instance and click Next Step as the default configurations would be good enough for our use case. You finish by clicking Create instance and it might take a while for the instance to be ready.
Adding your Lex bot to contact flows
Go back to your Amazon Connect service panel in AWS services (NOT the Amazon Connect instance URL) and click on the instance name and select the Contact flows. The contact flow defines the customer experience from start to end. We want the customer to talk to our bot instead of a real agent so we need to add the bot to the contact flow.
Select the Lex bot from the drop-down menu and click Add Lex Bot. Make sure you create the Lex bot and Amazon Connect in the same AWS regions to avoid delays.
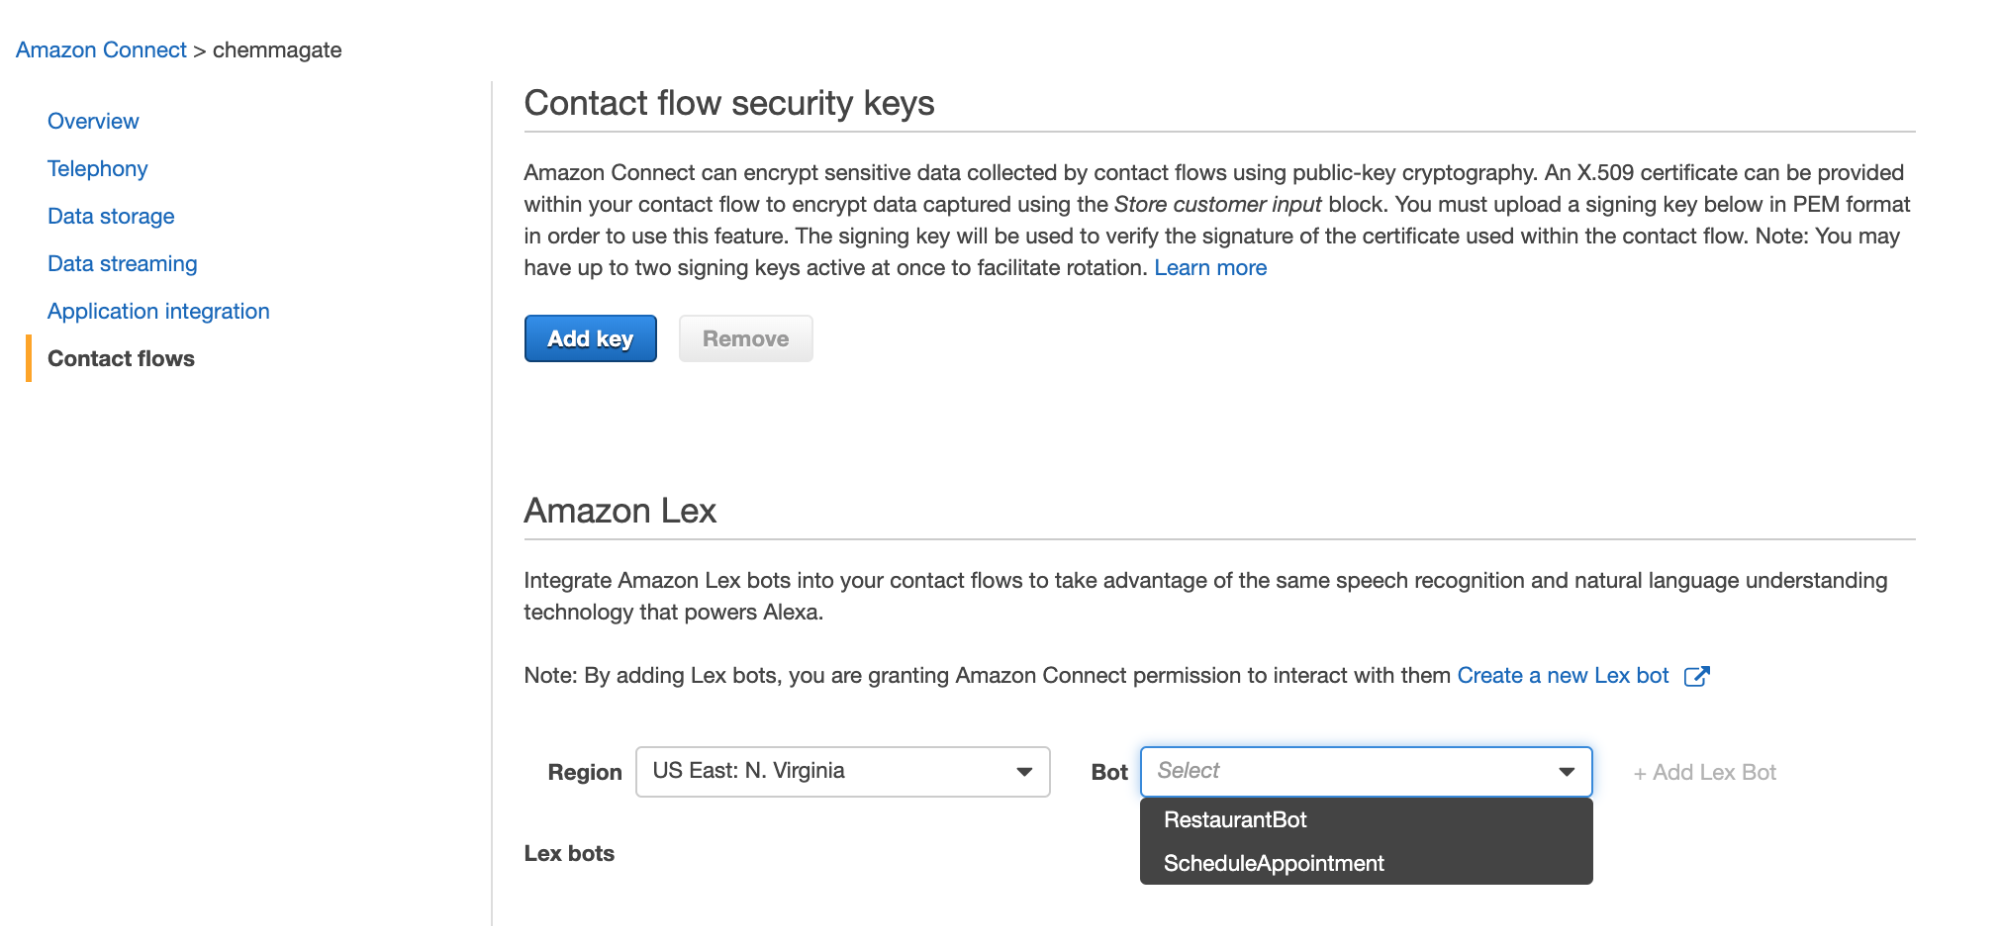
Setup your Amazon Connect Instance
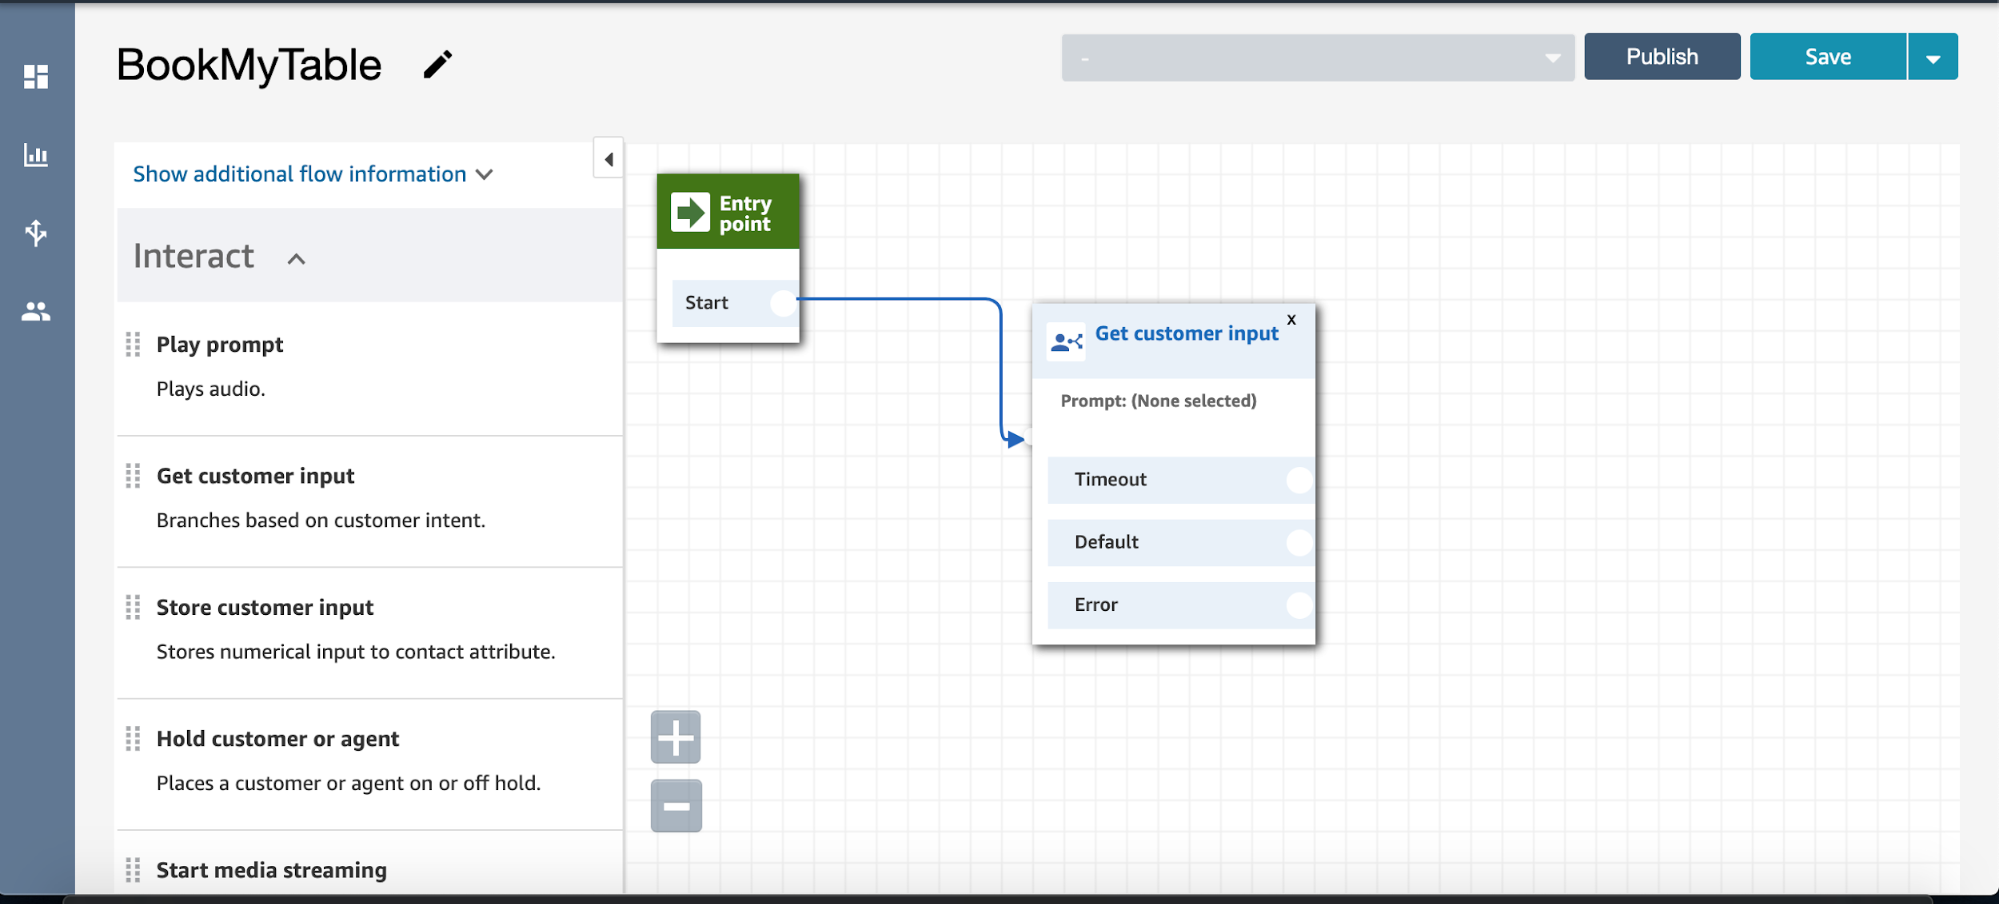
Login to your Amazon Connect instance (e.g. https://chemmagate.awsapps.com/connect/login) as Admin and click on Routing on the side panel and select Contact Flows. We are going to create a new contact flow for the bot as we want the customer input. Do not forget to give a name to your contact flow. Drag the Get customer input block under Interact onto the designer and connect it to the Entry point block.
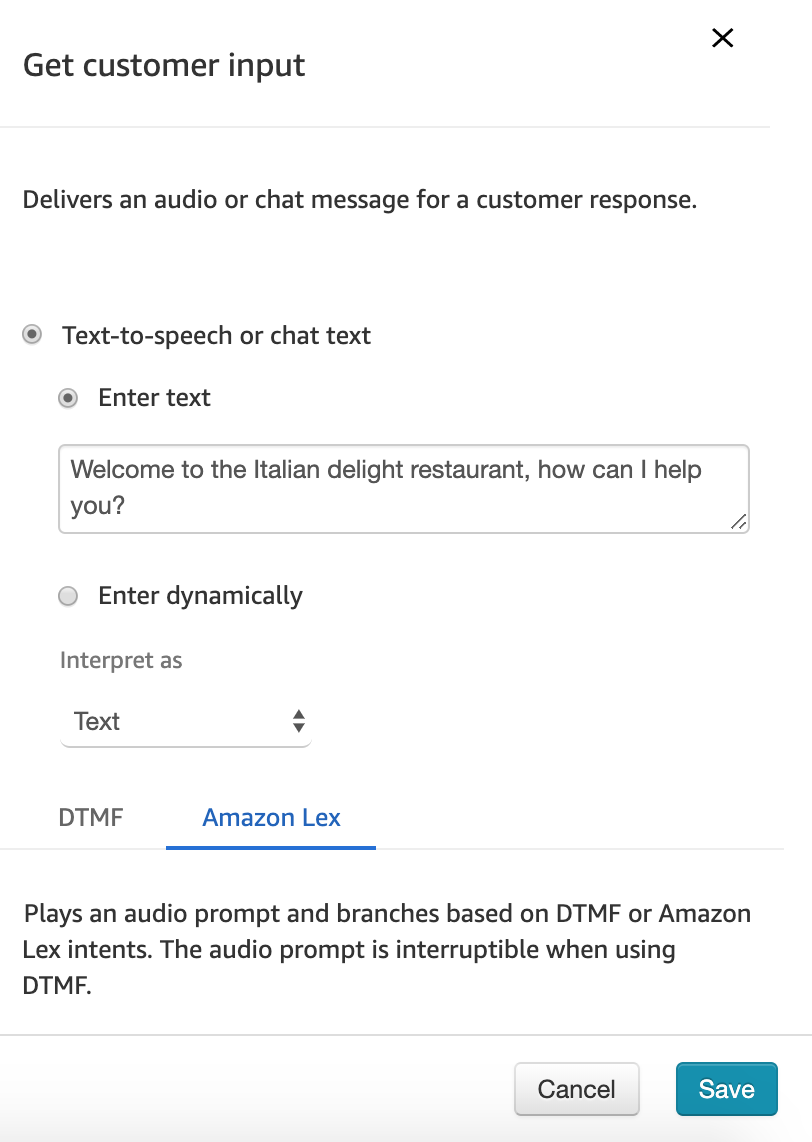
Click on the Get Customer Input block and Choose Text-to-speech or chat text. You will add greetings to your customer here in this text box.
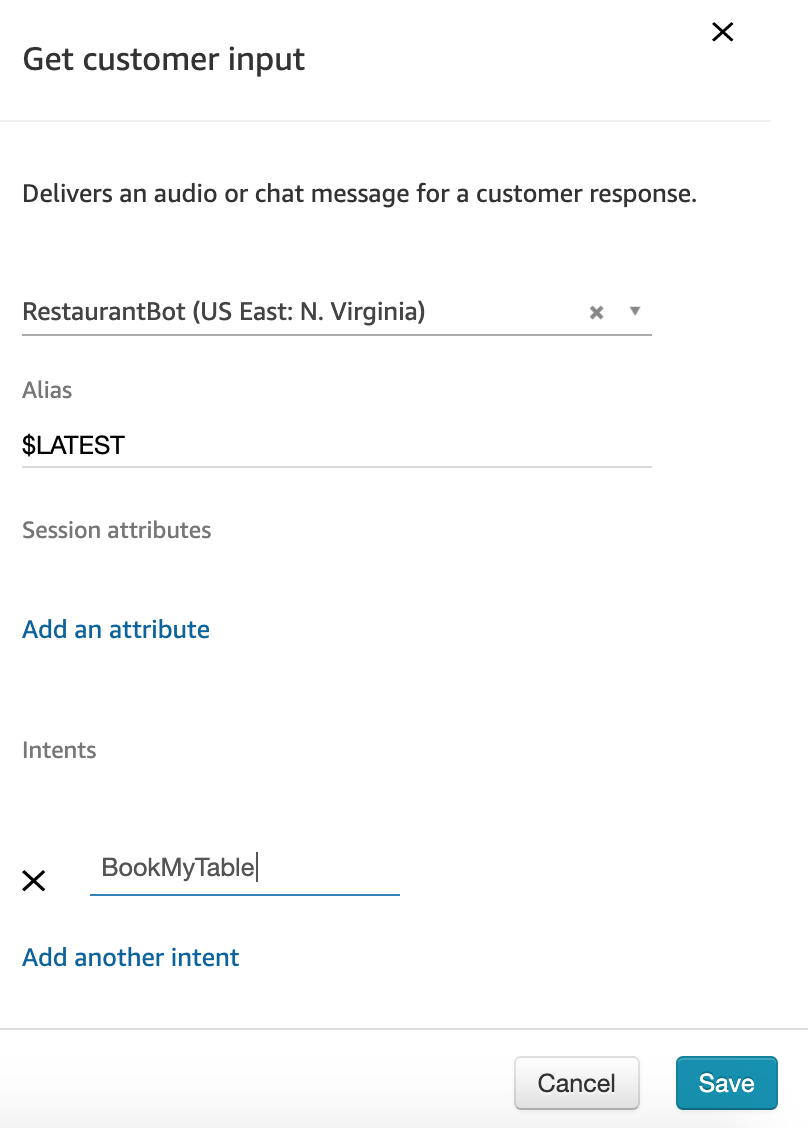
Choose Amazon Lex and select your bot from the list. Also, add the intent you created and save it. We can keep the alias as $LATEST as long as you do not have multiple versions of your bot.
You can add a block Disconnect/Hang up block so that your bot disconnects the call after it fulfils the intent. Press Publish to make this flow available to use (this is important).

Assigning a number to the contact flow
We will now claim a number for the contact flow we just created. Click on Routing on the side panel and select Phone Numbers. Choose Claim a number and choose the country and the number you would like to use. Select the contact flow you just created and click Save.
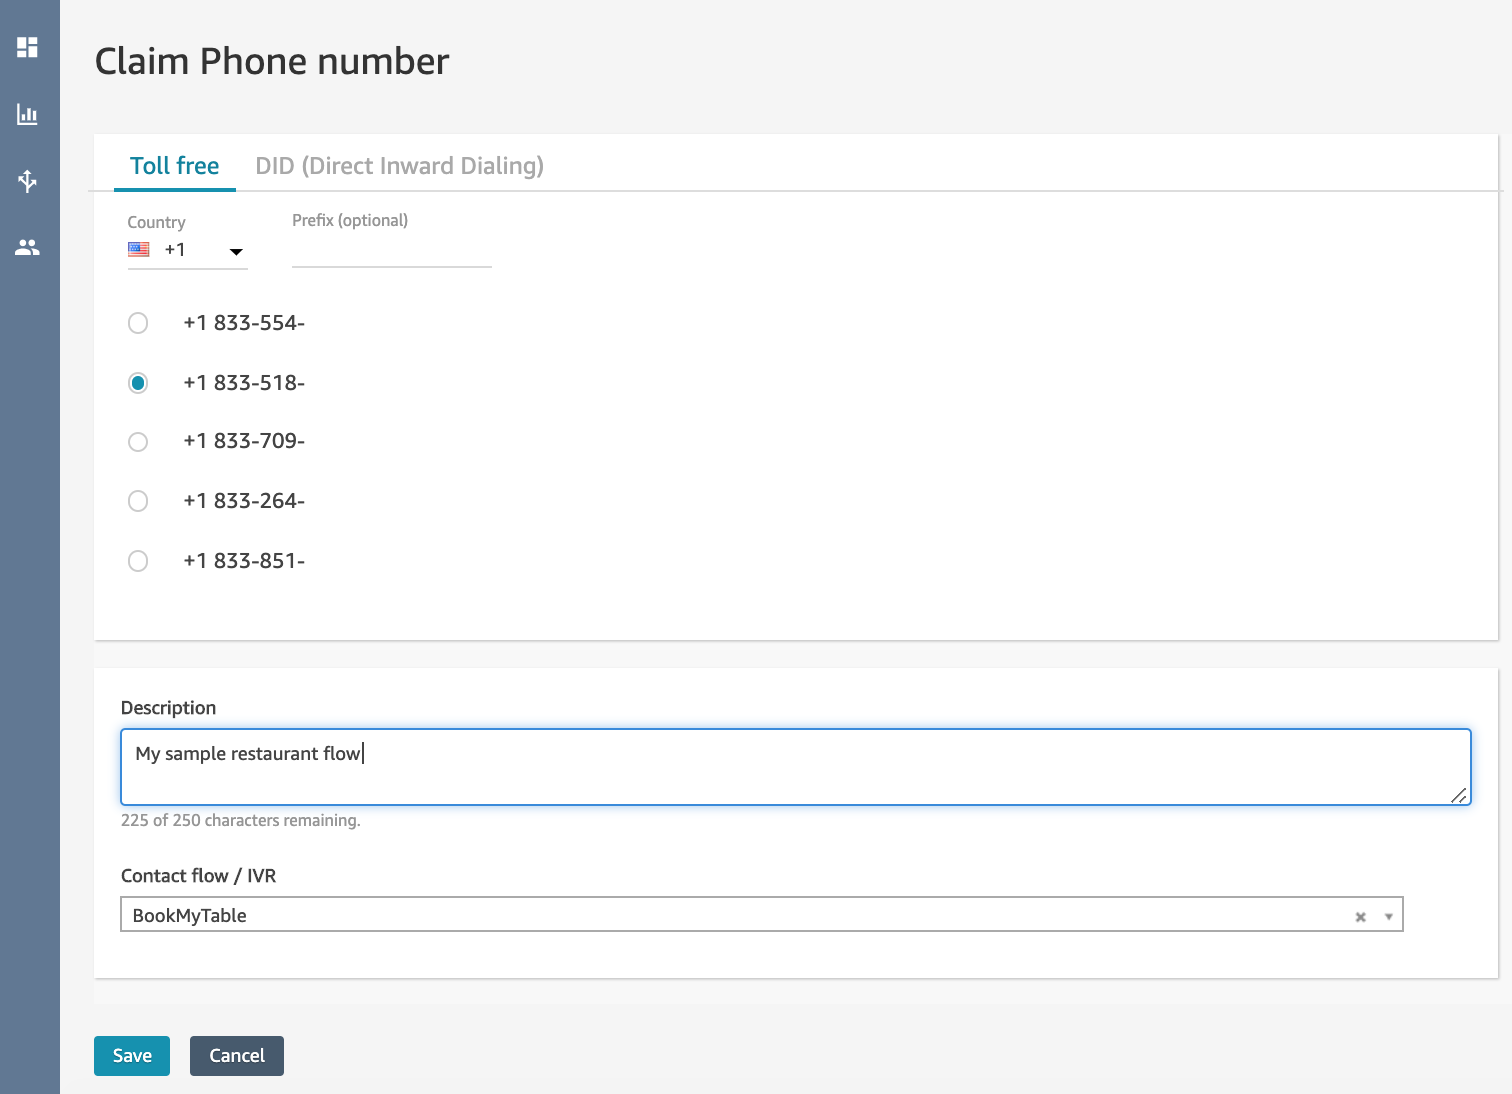
Call the number and ask “Can I have a table for Friday?” (or the utterances you created) and see how your bot responds. It might say “sorry, I could not understand, can you please repeat that”. After a few tries, it will eventually work 😀
Congratulations, you made a basic voicebot-based conversational IVR!
Recap & Conclusions
The whole process took me about 45 minutes as I had some previous experience with Amazon Connect so that part took the least amount of time in this setup. I had some hiccups while publishing the bot as it is very strict about the syntax and slot types. Of course this is a simple example and a real bot would need a lot more work.
Pros and Cons of the AWS approach
There are some advantages and limitations to the AWS approach:
Advantages
- Dial-in number to voicebot works seamlessly so you don’t have to do any telephony interface tricks
- Very easy to transfer the call to a human agent with Amazon Connect capabilities.
- Lambda functions enhance your bot’s skills tremendously as it can invoke notifications such as SMS, email or integrate with 3rd party systems
- Use DTMF or Amazon Lex for accepting input from the customer, unlike other systems which can only process one input type (DTMF or voice commands) at a time
- Easily integrate Amazon Lex with Facebook apps, Kik, Slack or Twilio SMS
Limitations
- Training utterances was more cumbersome than I expected - I had to provide many sample utterances to get the bot to pick up a variety of phrases for an intent.
- Confidence percentages are not exposed in the Lex GUI, so it is difficult to tell when you need to do more training for an intent
- There is no built-in small talk (like Dialogflow), so you need to train it to do everything
- The bot can go in a loop of asking the same question and annoy the user sometimes, which is again the lack of training
- Amazon Connect configurations can be complex for a telephony system beginner.
Scorecard
Looking at the scorecard Chad used in his previous voicebot IVR posts, Amazon Lex powered with Amazon Connect is a good fit for most voicebot IVR features.
| Requirements | Amazon Lex with Connect |
|---|---|
| Call Transfer | Yes |
| Recording | Yes |
| Playback interruption | No - cannot be set from Lex console |
| No activity detection | Yes - session timeout |
| DTMF detection | Yes |
| SMS | Yes - with Lambda functions or channels |
Amazon Connect offers typical dial-in telephony capabilities like transfer and record. When a feature isn't there, Amazon does provide some flexibility to extend functionaly with AWS Lambda functions with nice features like built in storage.
About the Author
Binoy Chemmagate is a product manager with 9+ years of experience in the ICT industry. He started his ICT career with Nokia as a standardization engineer and standardization bodies such as IETF and W3C have recognized his work on Web transport protocols. He has co-authored publications and patents in real-time communication and machine to machine communication fields. He has been an invited speaker at international WebRTC conferences around the world. In his free time, he is involved in product development coaching in the local startup ecosystem.


Comments